An Etsy listing I cleaned before it went live
Nine phone photos of a ceramic mug, one afternoon, and the two passes that made the listing look like a real shop.
MarketingA friend makes speckled stoneware mugs and had been sitting on a finished Etsy listing for three weeks. The mugs were good. The photos were the problem, and she knew it well enough to stall.
She sent me nine files. All shot on a phone, on a kitchen table, in afternoon light through one window. This is what I did with them.
Nothing about the setup was professional. No lightbox, no reflector, no tripod for most of the frames. That is the normal case for a small shop, and it is the case worth writing about.
What the photos looked like
Every file was between 2 and 4 MB, around 4000 by 3000 pixels. That sounds like plenty until you look closely.
The first thing I did was open one at full size rather than trusting the gallery thumbnail, which is where the real problem showed up.
The speckle in the glaze, which is the entire selling point of the mug, was mushy. Phone processing had read the small dark flecks as noise and smoothed most of them out. The handle edges had that slightly waxy look that phone sharpening leaves behind.
Nothing was blurry. The photos were simply flat in the places a buyer zooms into.
There was a second, quieter problem. Because the nine photos had been shot across two sessions, they did not look like a set. Some were warmer, some flatter, and a listing page shows all of them in a row where that inconsistency is obvious.
The pass that fixed it
I ran all nine through the AI Image Enhancer on the PRO setting rather than the standard one, at 6 credits each.
That choice mattered here. The standard path compresses and resizes the file in the browser before sending it, capping around two megapixels. These were twelve megapixel files where the detail lived in fine texture, which is exactly the detail a resize throws away first.
Fifty four credits for nine photos. On the Standard plan that is a rounding error against a monthly pool of 1000.
The speckle came back on every one of them. Not invented, recovered. Comparing at full size, you could count individual flecks that had been a grey smudge before.
Each run took under a minute. The slowest part of the afternoon was uploading nine files one at a time, since there is no batch mode in the workspace.
I checked the results the same way every time. Open at full size, look at the glaze speckle, look at the handle edge, look at the shadow under the base. If those three held up, move on.

The one shot that needed more
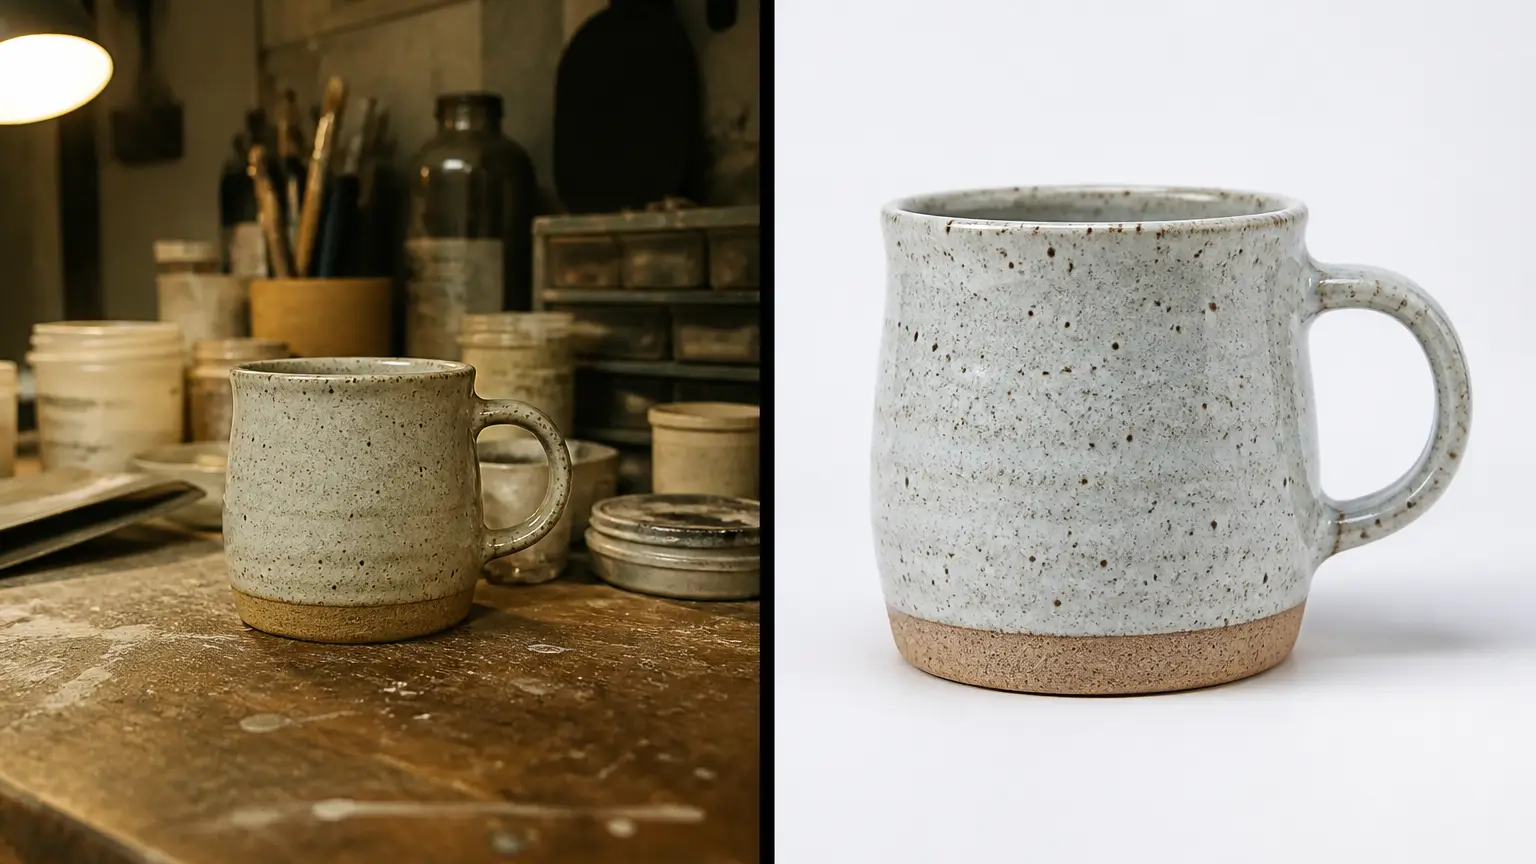
The lead photo had a problem no cleanup pass solves. A wooden fruit bowl sat in the background, slightly out of focus, pulling the eye away from the mug.
That one went through the AI Background Remover at 2 credits, then back onto a plain warm grey I filled behind the cutout.
The cutout was clean around the mug body and slightly rough where the handle met the rim. I would not use it for a print catalog. At listing thumbnail size it is invisible.
I did not try to match the two shooting sessions by hand. Running every file through the same pass at the same setting evened them out enough that the row of thumbnails stopped looking assembled from two different days.
Order matters and I got it right by accident. Cleaning first and cutting second gave the remover crisper edges to find. When I later tried it the other way on a spare file, the cutout picked up a jagged shoulder along the handle.
One more thing I would do differently. The cutout is only worth it on the lead image. On the other eight the wooden table is context a buyer wants, and stripping it would have made the set look like stock photography.
What changed in the listing
Two of the nine also needed a straighten before anything else, since the table edge ran visibly downhill. That is a crop job in any photo app and no model does it for you, but a tilted product shot undermines the whole set faster than softness does.
The honest answer is that I do not have a controlled before and after on sales, because the listing had never been live. What I can report is what changed in the files.
- Nine photos went from flat to showing glaze texture at full zoom.
- The lead image lost a distracting background object.
- Total spend was 56 credits and about forty minutes, most of it uploading.
- No reshoot, no lightbox, no second afternoon.
Total credits for the afternoon came to 56. On the free plan that would have been nearly six days of refills, which is the honest argument for a paid tier if you sell anything regularly.
She listed it that evening. The part she noticed first was not sharpness. It was that the nine photos finally looked like a set, because the same pass had been applied to all of them.
The routine itself is the same four steps I use on any soft phone photo, written out in clean up a soft phone photo in four steps. The only change for product work is choosing the PRO setting so texture survives.
If you are sitting on a finished listing because the photos embarrass you, that is a one afternoon problem, not a new camera problem.