Anime Enhancer vs photo upscaler
One Picverce AI model is trained on line art and one on photographs. Running a drawing through the wrong one softens exactly what makes it a drawing.
RecommendationsBoth of these make a small picture bigger. What they consider an improvement is completely different.
The cost is different too, and not in the direction most people assume.
Line art is not texture
A photo upscaler is trained on photographs. The AI Image Upscaler is looking for skin, fabric, foliage and the kind of fine texture a camera records.
The model behind the AI Anime Enhancer is trained on anime and manga artwork instead, so it reads line art, character features and flat colour areas.
That difference decides what each one does to a drawing.
Neither is better in general. Each is better at the thing it was shown thousands of examples of.
A drawing is mostly flat colour separated by deliberate lines. There is no texture inside those areas because the artist did not put any there.
Absence of detail in a drawing is a decision. Absence of detail in a photograph is usually a loss.
That one distinction is the whole difference between the two models.
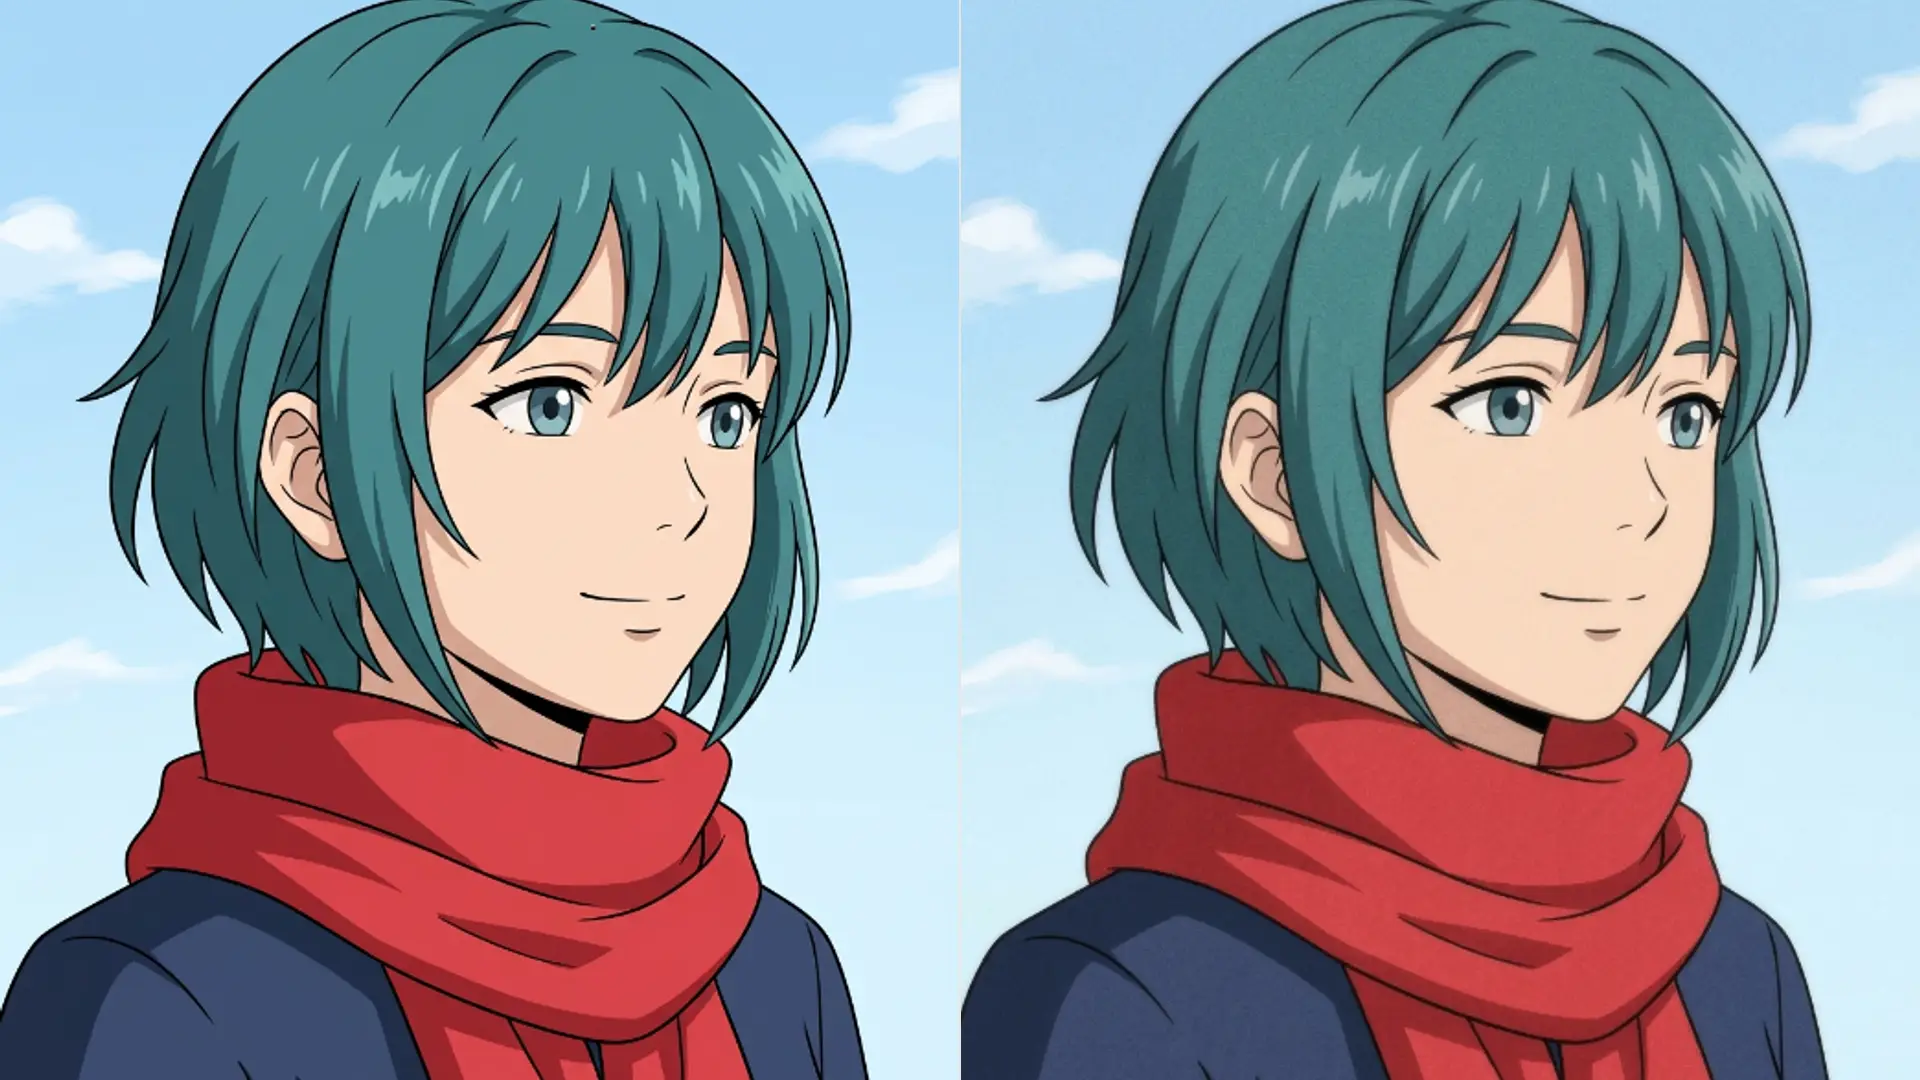
A photo model looking at a flat area assumes detail has been lost and tries to invent some. You get faint noise where the artist intended clean colour.
It is trying to be helpful. Recovering texture is the right instinct on a photograph and exactly wrong on a drawing.
It also treats a bold outline as a hard edge to smooth rather than as the point of the picture. Lines come back softer and slightly uncertain.
Soft linework is the tell. A drawing enlarged by a photo model looks slightly out of focus even though nothing is blurred.
The anime pass does the opposite and keeps the edge defined, because a defined edge is what it learned a drawing is made of.
When I put the same 600 pixel fan art through both, the photo route gave me a larger image with mushy outlines and the anime route kept the linework crisp.
The flat colour areas told the same story. One came back with faint speckling in them and the other stayed clean.
Scale and cost
The numbers are worth knowing because they do not line up the way you would expect.
- The anime pass costs two credits and goes up to four times the original resolution.
- The photo upscaler charges by how far you push it. Two times costs two credits, four times costs three, and eight times costs six.
- So at four times, the anime route is cheaper as well as more appropriate for artwork.
There is no eight times option on the anime side. If you genuinely need that much, the photo upscaler is the only route and you accept the trade.
A second option is to take the anime result up to four times and then send that through the photo route, which costs more and keeps more of the linework than going straight to eight.
In practice four times is enough for most artwork. A 600 pixel image becomes 2400, which prints at a sensible size.
Going further than you need is not free and rarely helps. An eight times enlargement of a small drawing invents four times as much that was never there.
Both return the file immediately and neither adds a mark of its own.
Most images finish inside a minute on either route, so speed is not the deciding factor.
Which images count as anime
The boundary is broader than the name suggests, and it is about drawing style rather than subject.
- Anime screenshots and manga panels, which are the intended case.
- Digital illustration and fan art, where clear line art is doing the work.
- Cartoon style images generally, since flat colour and defined edges are what it is reading.
- Anime wallpapers, which is the common use for making something fit a large display.
What it is not for is a photograph of a person in cosplay. That is a photograph, whatever the subject is wearing.
The same goes for a photo of a manga page. The subject is drawn and the file is a photograph, and the photo route usually handles the paper texture better.
A clean scan of that same page is the opposite case and belongs on the anime side.
Painted digital art with soft blending sits in between. It has no hard line art, so neither model has an obvious advantage and it is worth trying both.
At two and three credits respectively, trying both is a cheap experiment and a more reliable answer than guessing.
The pass keeps the original style deliberately. It is built to respect anime characteristics rather than to modernise them, so a deliberately rough 1990s look stays rough.
That matters if you are working with older scans. A model that tidied the style would be losing the thing you liked.
Gains show up most on pixelated or blurry sources. A drawing that is already sharp gets bigger without getting noticeably better.
So the honest expectation is that this fixes small and soft, not small and fine.
Accepted formats are JPG, JPEG, PNG and WebP. Most images finish inside a minute.
Getting a small drawing up to print size is a job with its own sequence, which is walked through in fan art print from a small png.
Ask whether a camera made it. If not, use the anime route, and it will usually be cheaper too.