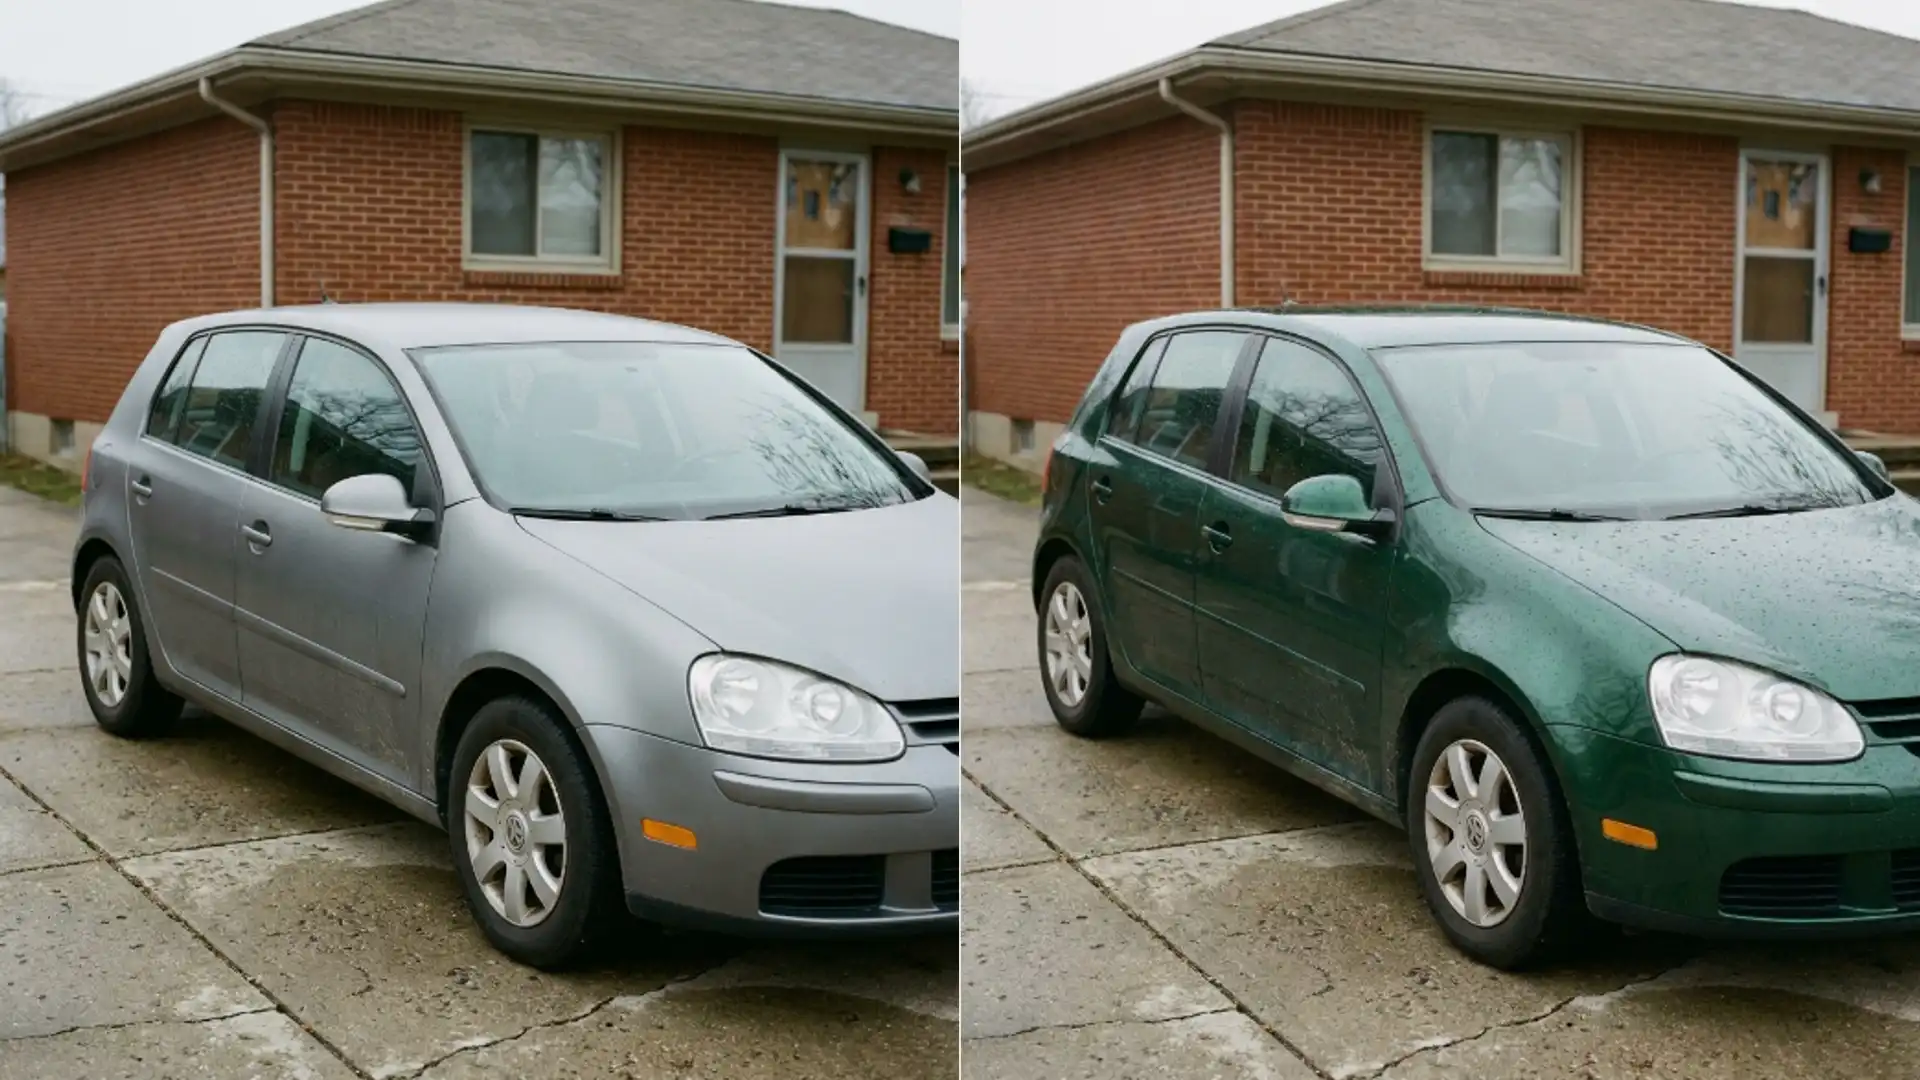
Change a car color with a prompt
A step by step run for recolouring one object in a photo with the Picverce AI Image Editor, and the clause that stops the rest of the shot changing.
TutorialsRecolouring a car is the job that teaches you how this tool thinks. You are not picking a colour from a swatch, you are writing a sentence and hoping it lands only where you meant.
Here is the run, and the second half of the prompt matters more than the first.
This tool has no style grid
Every other design theme hands you a grid of presets. The AI Image Editor does not, and that absence is the whole point of it.
What you get instead is twelve worked examples. Cinematic Sky, Oil Painting Portrait, Colour Change, Background Replace, Studio Retouch and others.
Those are not buttons that apply a look. They are demonstrations of how to phrase an instruction, and reading them is genuinely faster than guessing.
Because there is no preset doing half the work, the sentence you write is the entire instruction. That is more freedom and more responsibility at once.
Start from a photo. Every one of those examples begins by referring to this photo, which tells you the tool expects something to work from rather than building from nothing.
Reading two or three of the examples before writing your own is the fastest way to pick up the phrasing. They all share a shape, and that shape works.
Write the instruction in three parts
The built in colour change example is a good template and it splits cleanly into three jobs.
- Name what changes. The main subject in this photo, or more specifically the car body.
- Name the new state. A vivid deep red rather than just red.
- Demand preservation. Keep the textures, the shadows and the reflections natural.
That third part is the one people leave out, and it is the one that decides whether the result is usable.
Without it the model is free to reinterpret the whole photo. You ask for a red car and get a red car in a slightly different parking space under slightly different light.
Being specific about the subject helps too. The car body is better than the car, because wheels, trim and windows are all part of a car and you probably do not want them red.
When I ran this on a silver hatchback, naming the body specifically kept the alloys silver. The looser version painted the wheel centres too.
Order matters a little. Putting the preservation clause last seems to help, since it reads as the final constraint rather than something the rest of the sentence overrides.
Name the colour properly
Red is a wide instruction. Deep burgundy, bright pillarbox red and dusty terracotta are all red and none of them look alike.
Two words beats one every time. A modifier plus a colour gives the model somewhere specific to land.
Naming a finish helps as much as naming a hue. Matte, metallic and gloss all reflect differently and the model does respond to the word.
Judge the reflections first
A recolour succeeds or fails on the things touching the colour rather than on the colour itself.
- Reflections on the paint. They should still show the sky and the surroundings, not a flat wash.
- The shadow under the car. It should be the same shadow, in the same place.
- Panel gaps and trim. Those lines should survive rather than blurring into the new colour.
- Anything red nearby. Brake lights and other cars sometimes get recoloured along with the subject.
That last one is the sneaky failure. The model finds the concept of the colour rather than the object, and anything similar comes along for the ride.
If it happens, name the subject more tightly and say explicitly that everything else stays as it is.
Compare the two images at full size rather than as thumbnails. A shifted background or a softened number plate is invisible small and obvious large.
What this costs and when to stop
Editing runs through the same workspace as generation, so the credit figure in the settings panel moves with the model and the resolution you pick.
Read that panel rather than assuming a fixed price. Two attempts on the same photo can cost different amounts if you changed the resolution between them.
Draft low while you are tuning the sentence. The wording is what you are testing, and wording is legible at any resolution.
Three attempts is a sensible budget. If the colour is right but the shadow moved, tighten the preservation clause rather than rewriting the whole thing.
Rewriting from scratch loses whatever was working. Changing one clause at a time tells you which clause was doing the job.
If three attempts all drift, the source photo is usually the problem. A car half in shadow gives the model an ambiguous boundary to work with.
If you want to build a picture rather than change one, the AI Image Generator is the other door and it starts from a description instead of a photo.
The prompt discipline is the same one that makes any instruction portable, which is worked through in Picverce AI Image Generator workspace.
Name the part, name the colour, protect the rest. Three clauses and most recolours land on the first or second try.